
In an effort to help REALTORS make the most of their current “work from home” situations, we’re covering a how-to series that strives to answer the question, “How can I use RPR right now to meet the needs of my clients and generate new prospects?”
In this article, we’re specifically looking at generating a mailing list for your next direct mail campaign. Along the way, you’ll have some decisions to make, such as:
- Who is your target audience?
- Are you looking to connect with investors?
- Current homeowners?
Knowing these answers is critical to getting the proper contacts for your campaign. This is where Absentee Owners versus Owner Occupied comes into play.
For example, you may want to send owner-occupied homes a custom message about the current market and their current needs. Absentee-owned properties, on the other hand, might appreciate an update on current home values and that now is a good time to cash in on their investment. It’s crucial to understand which address is the most appropriate to use for each situation to make sure your message is delivered properly.
Finding these specific addresses and creating your mailing labels for them isn’t that hard to pull off once you get the hang of it. Here’s how to do it in RPR.
It Starts With Search
1. Visit RPR at narrpr.com.
2. Choose the All Properties search.
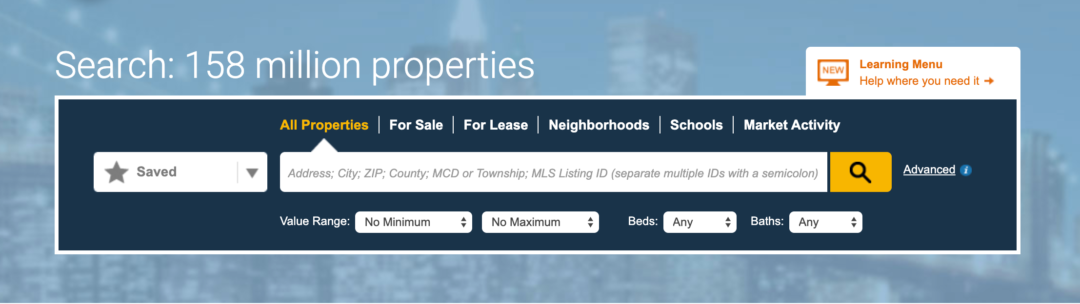
3. Enter a geographic area into the search bar.
4. Select the search button (the magnifying glass icon)
5. From the search results, you have a few choices on how you arrive at your results:
- Use the filters to narrow results
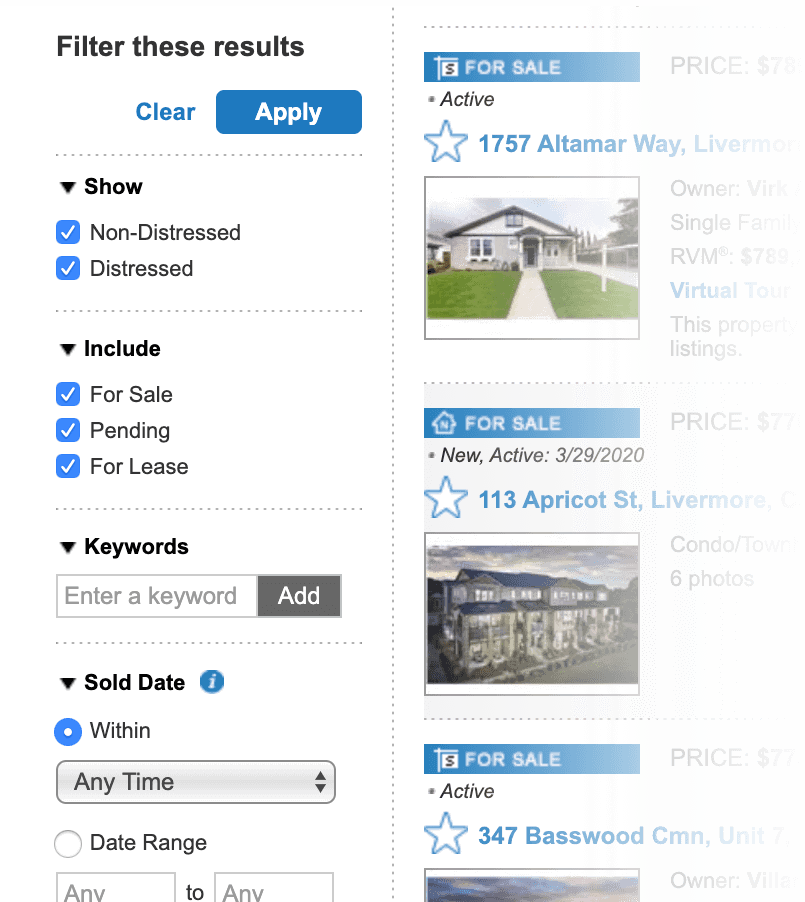
- Use the RPR map to draw a geography and narrow results
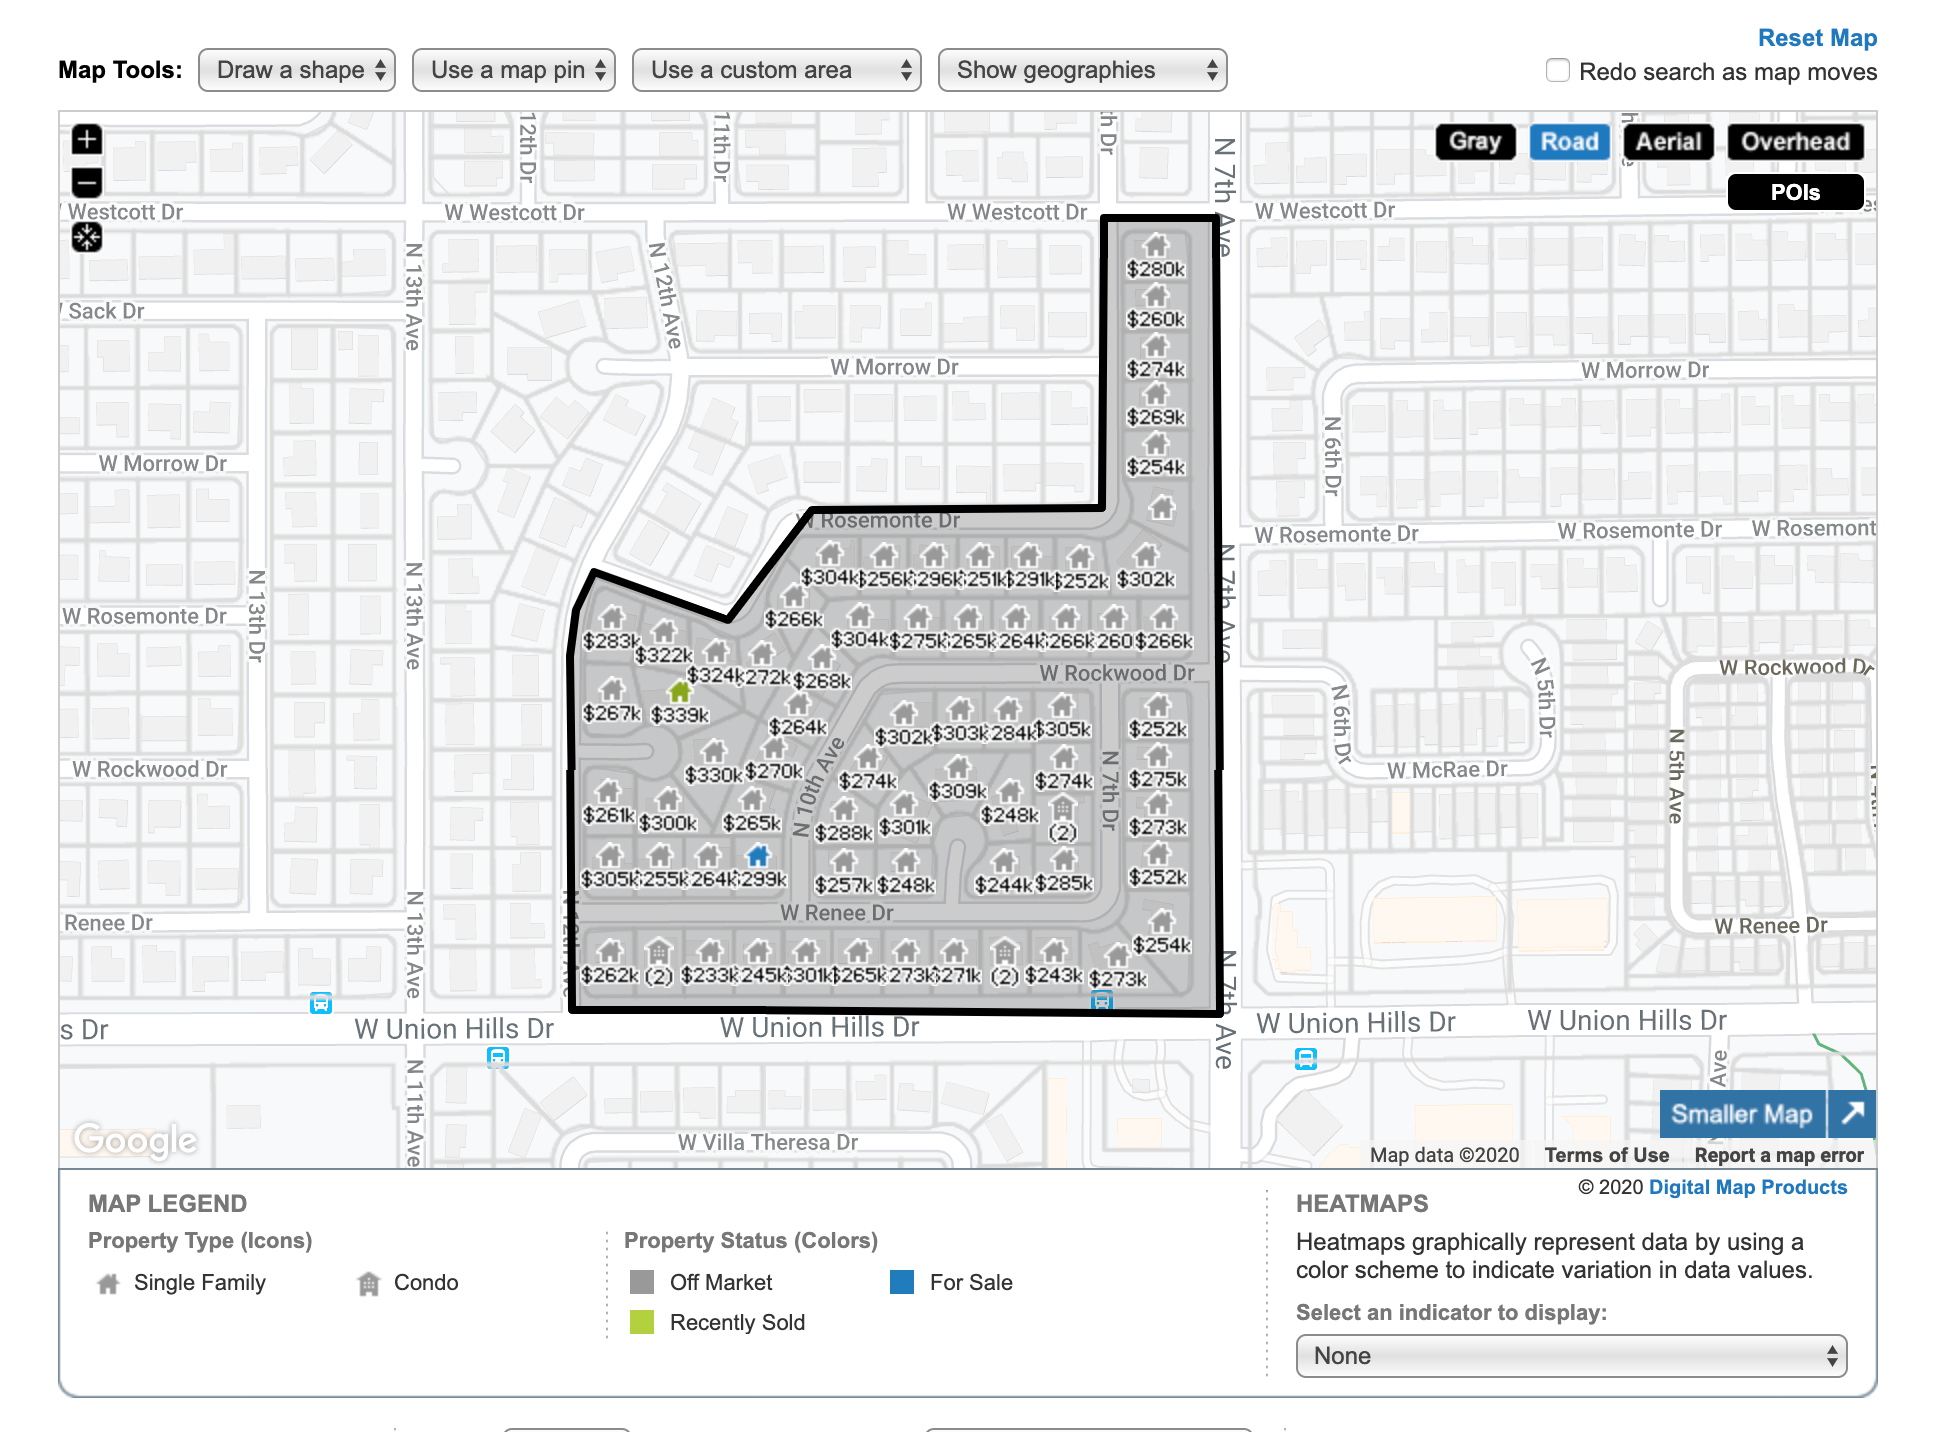
6. Once you have your search results set, select Mailing Labels.

7. The Mailing Labels dialog opens.
8. Choose your layout: Select CSV or PDF.
- If PDF is selected, choose from three format options:
- Avery 5160: 30 per sheet
- Avery 5161: 20 per sheet
- Avery 5162: 14 per sheet
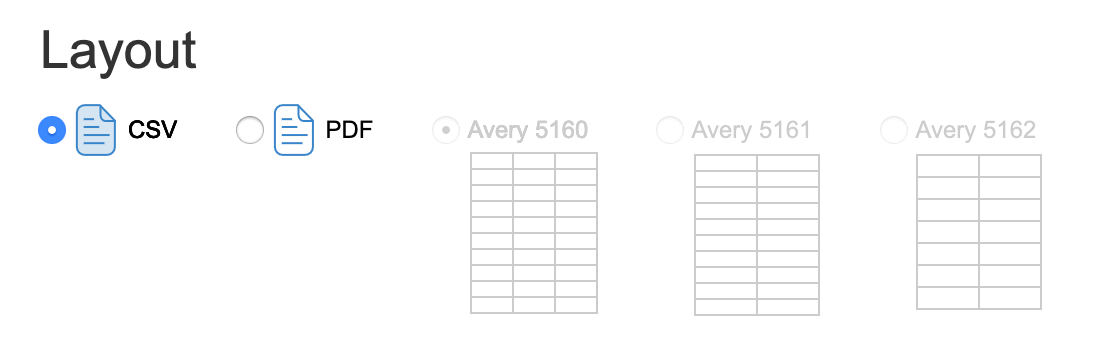
- If CSV is selected, your output will include these columns:
- Full Name
- First Name
- Last Name
- Full Street Address
- Address
- City
- State
- ZIP
- ZIP+4
- On Do Not Mail List
Customize your labels:
9. Select Address Type: Property or Tax Billing
- Choose Tax Billing if you want to reach Absentee Owners
- Choose Property if you want to reach Owner Occupied
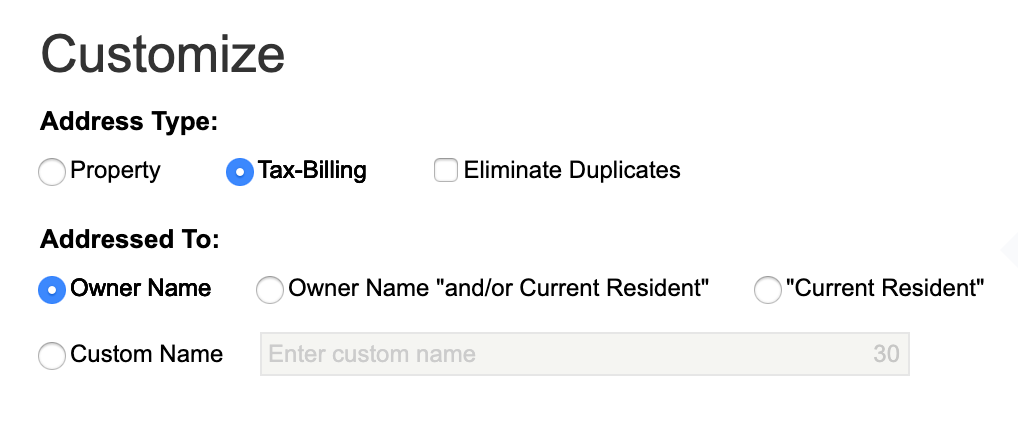
10. Choose how you want the labels addressed:
- Owner Name
- Owner Name “and/or Current Resident”
- “Current Resident”
- A Custom Name you select
Filter your labels:
1. Choose Occupancy Type:
- All – Includes all properties in the search results
- Owner Occupied – Only includes properties where the fields “Owner Occupied” is set to Yes
- Absentee Owner – Only includes properties where the fields “Owner Occupied” is set to No
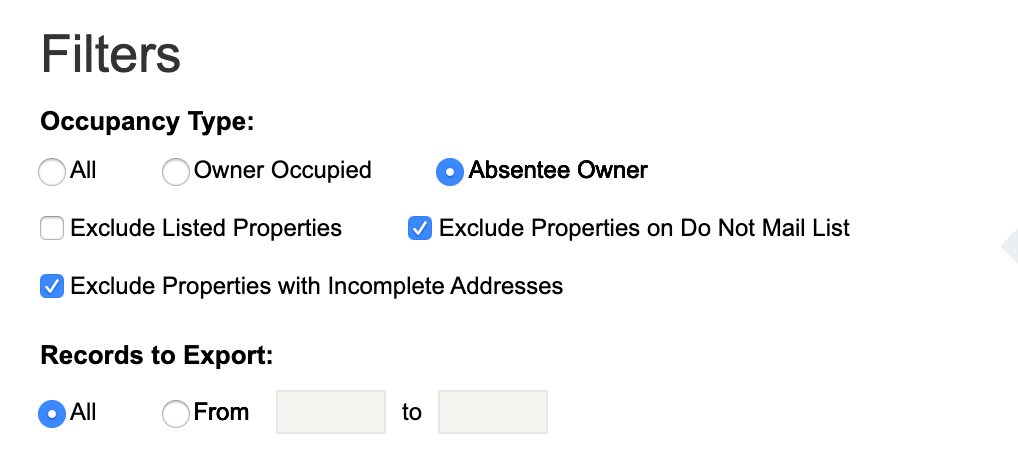
2. Select which labels to exclude:
- Exclude listed properties
- Exclude properties on Do Not Mail list
- Exclude properties with incomplete addresses
3. Select which records to export. Remember, you have a max of 2,000* each month. (*Now 4,000 thru June 2020)
- Select All
- Or choose a Range (From/to): controls the number of records to export by specifying a selection range.
To view the original article, visit the RPR blog .
.